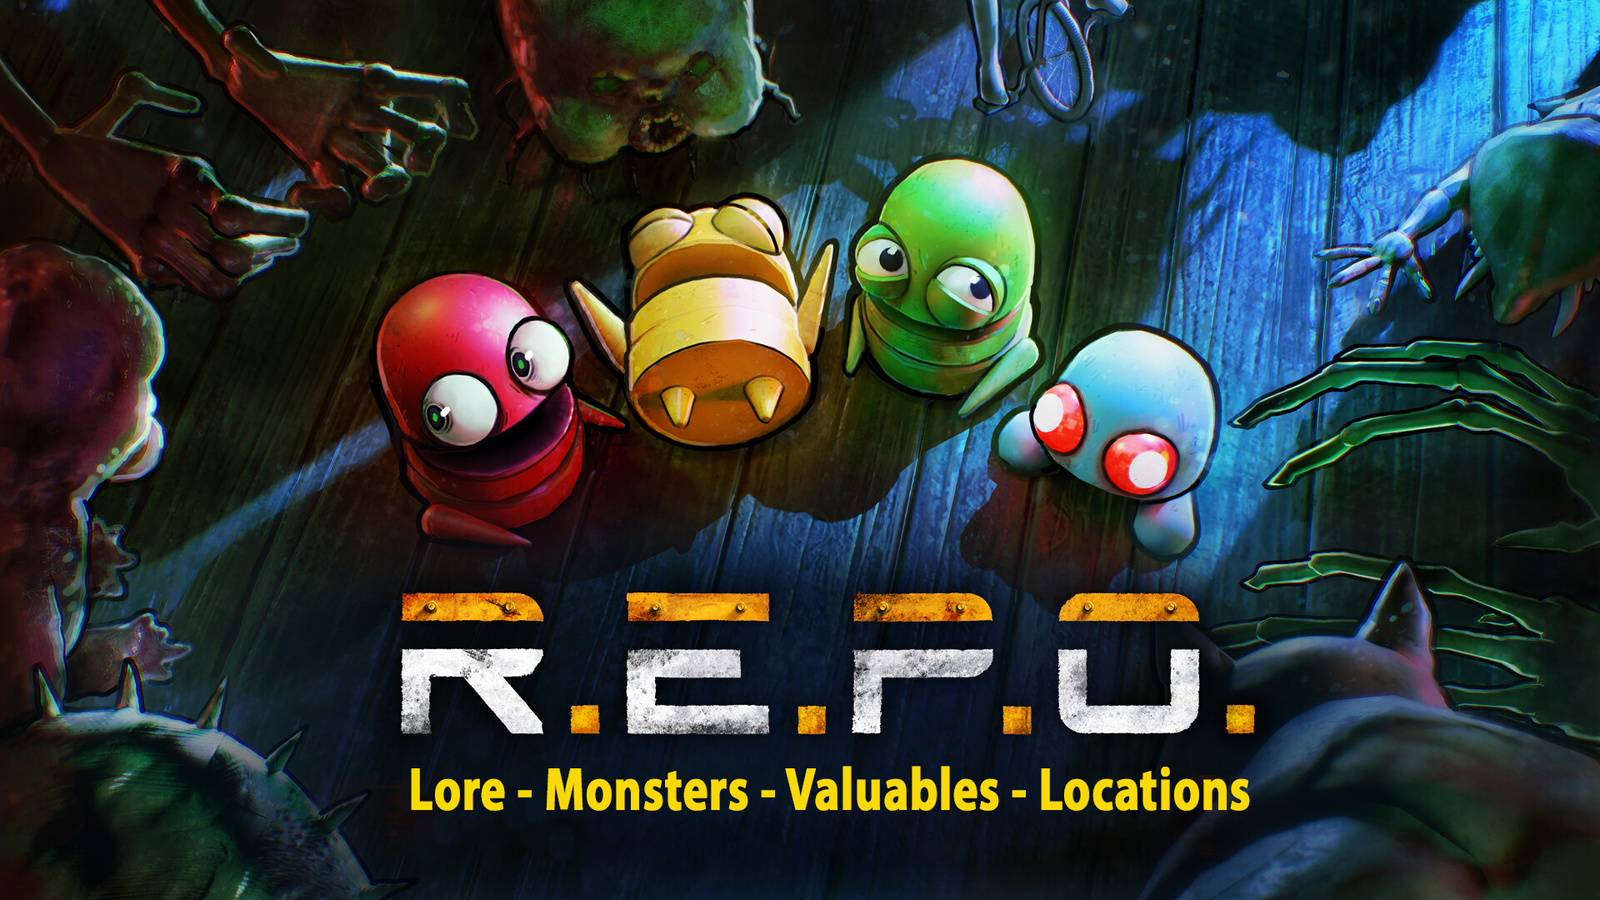
We’ve been playing a lot of R.E.P.O lately as our multiplayer game of the week, and we are starting to get decently far in the game. I figured now would be a good time to talk about the game’s lore and what it is all about.
What is R.E.P.O.?
R.E.P.O. is an online co-op horror game featuring physics, proximity voice chat, and scary monsters. You and up to 5 other players venture into terrifying locations to extract valuables using your physics-based grabbing tool.
The game is developed by the indie game studio semiwork from Sweden using the Unity engine and was released on Steam on February 26, 2025. The game became very popular in the first days after release. The game has gameplay similar to other extraction looters, such as Lethal Company and Content Warning, which share a similar aesthetic and gameplay balance.
The game is currently in early access, but it already has enough content for intense gameplay (based on this Q&A by the developers, at least 12 months)
The developer semiworks confided that R.E.P.O. was originally a single-player cleaning game in which you had to clean a mansion while the headman chased you around. The code and models for the cleaning devices, such as the vacuum cleaner and the duster, are still in the game, and the device we use to pull up the map today is actually called a dirt finder in the files. Before the Robots were added, their placeholder was a pill-shaped body with a square head. This early version still had the puppet-like head mechanic when speaking, as shown here.
What is the Lore?
R.E.P.O.’s lore is not explicitly stated; however, we have various details, clues, and hints about what may have happened so long ago and why we are here now. The details here are subject to scrutiny, change, and updates as more people weigh in, perspectives change, and info is released.
Who is the Taxman?

The Taxman is the overseer of the Semibots and, most likely, a digital mind, an AI, or some being responsible for collecting taxes. In-game, he uses emojis as his primary means of communication, with a fleshy, horrific version of the crying-laughing emoji as his preferred appearance. While not much is known about the Taxman or his origins, there are a few theories:
Taxman’s Goal
A common and widely believed theory is that Taxman’s goal is to collect taxes. In the real world, when taxes are unpaid, you have possessions repossessed, and that objective is incredibly similar to what we do in the game. This leads one to think that, because humans are long gone (or very sparse), there is no one to pay these taxes. This leads the Taxman to repeatedly attempt to repossess items to pay their debt, regardless of the person’s presence. Some evidence supporting this is that we find valuables in the Disposal Arena. If Taxman were truly set out to gain money purely for profit, why would he discard precious valuables? The most likely answer is that, besides fulfilling the tax quotas, he has no use for these valuables and discards them.
TL;DR – An abandoned robot to collect taxes continues its goal long after those who would pay are gone.
Who are the Semibots?

The Semibots are robots you play as and serve the Taxman’s goal. We can see how, throughout the game, humans have mixed views on the Semibots: some see them as villainous or evil, while others see life in them, as evidenced by various graffiti and artwork in the Museum of Human Art. We know for a fact that the Human Group actively hated and hunted Semibots, with shooting ranges, traps, and cages with dead Semibots seen belonging to them. While we know a decent bit about the Semibots, their origin is unclear, but a few theories have come up:
Cleaning Bots Given New Purpose
Semibots are relatively harmless in function and appearance. This doesn’t stop them from using weapons or objects lethally, but one might think a robot built for combat and repossession would have its flashlight and map built in. However, a common theory suggests that the Semibots were once cleaning or service droids used for chores, maintenance, and caretaking. Things like their friendly designs with expression and voice, multiple-purpose tractor beams for tools and fragile items, and even their small form factors in tumble mode point to this, and, while most likely considered non-canon now, the original premise of R.E.P.O. being a cleaning house could point to this.
Indentured Servitude
Nonetheless, why would the Semibots be working for Taxman? Of course, it could be assumed he simply infected the Semibots somehow, but there is another popular theory that suggests human souls are inside the Semibots. There are a few points to suggest this:
- Monsters’ souls are shown to be tangible objects with a worth in the form of Enemy Valuables.
- The Semibots have two voices, one is a computerized Text-To-Speech voice, and another is your mic, your human voice itself.
- Their name, Semibot, while connected to R.E.P.O.’s developers, Semiwork, suggests they may be only semi-robotic, with the other half possibly something alive or non-artificial.
- In this art from the Museum of Human Art, we see a Semibot with a heart displayed inside of it.
- In a message from Taxman to you, you see “🤔🤝😂”, which could hint at the unstable deal you took to repay him.
- In the tutorial of the game, you can see “-1,000,000” in red text where your total money should be, implying some sort of debt, and your soul was used to pay for it.
- Semiwork has also acknowledged this theory in their dev log about fixing overcharge. One could assume a human with no valuables left to repossess could have their soul used inside a Semibot for indentured servitude, which would give more weight to why humans hate them; not only do they take their valuables, but they also turn their peers into workers. We don’t yet know to what extent a Semibot can function without a soul, or if the Taxman hacked and repurposed them from their original design, but current evidence suggests there’s some connection between human and machine.
Where are the Humans?
Based on the Stowaway and other skeletons found at those locations, as well as the Human Group’s foundation, it is likely that an apocalypse occurred. It is currently unknown what kind of apocalypse it is, though.
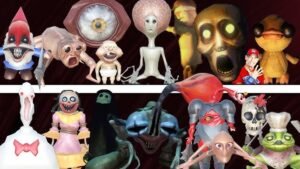
Who are the Monsters?
The Monsters complicate the process of retrieving valuables for the semibots, whether by damaging or killing them, damaging or destroying valuables, and more.
| Name | Appearance | Danger Level | Health | Damage | Detection | Strength Breakpoint | Strength Breakpoint (Stunned) | Attacks Crouched Players | Orb Size |
| Cleanup Crew |
 |
3 | 350 | Head Explosion: 85 (75 + 10)Melee: 60 (20 + 40) Radiation: 15 (Per second) | Line of Sight, Proximity, Touch | 13 | 5 | Yes | Large |
| Gambit |
 |
2 | 150 | Red wheel space: 50Black wheel space: Sets hp to 1
Interruption: 60 |
Line of Sight, Proximity, Touch | 9 | 3 | Yes | Medium |
| Headgrab |
 |
2 | 150 | Normal: 5 (Per hit)Dropkick: 15 (5 + 10) | Line of sight, Proximity, Touch | 4 | 0 | Yes | Medium |
| Hidden |
|
2 | 100 | None | Line of Sight, Proximity, Touch | 4 | 1 | Yes | Medium |
| Loom |
 |
3 | 500 | Clap: 100Shockwave: 25 (Physics) | Proximity, Touch | 13 | 5 | Yes | Large |
| Animal |
 |
2 | 150 | 2 (Per hit) | Line of Sight, Proximity, Touch | 4 | 3 | No | Medium |
| Peeper |
|
1 | 30 | 2 (Per second) | Line of Sight | [Impossible] | [Impossible] | Depends (Via Line of Sight) | Small |
| Oogly |
 |
2 | 200 | 4 (Per hit) | Line of Sight, Touch | 9 | 0 | Yes | Medium |
| Bella |
 |
1 | 200 | 5 (Per hit) | Blocking Path, Touch | 9 | 0 | Yes | Small |
| Bowtie |
|
2 | 200 | 5 (Per hit) | Line of Sight, Proximity, Touch | 7 | 5 | Yes | Medium |
| Apex Predator |
|
1 | 150 | 10 (Per hit) | Line of Sight, Proximity, Touch | [Impossible] | 0 | Yes | Small |
| Birthday Boy |
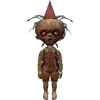 |
1 | 150 | 10 (Per hit) | (After balloon pop) Line of sight, Proximity | 4 | 0 | Yes | Small |
| Chef |
|
2 | 150 | 10 (Per hit) | Line of Sight, Proximity, Touch | 9 | 2 | Yes | Medium |
| Gnome |
|
1 | 20 | 10 | Line of Sight, Proximity, Touch | 0 | 0 | Yes | None |
| Reaper |
|
3 | 250 | 10 (Per hit) | Line of Sight, Proximity, Touch,Sound | 9 | 1 | Yes | Large |
| Spewer |
|
1 | 65 | 10 (Per hit) | Line of Sight, Proximity, Touch | 4 | 0 | Yes | Small |
| Tick |
 |
1 | Normal: 10If drained hp: 20 – 100 | 10 (Per hit) | (When Holding something)Line of Sight, Proximity, Touch | 0 | 0 | Yes | If not Full (10 – 90 hp): NoneIf full (100 hp): Small |
| Upscream |
 |
2 | 50 | 10 | Line of Sight, Proximity, Touch | 4 | 0 | Yes | Medium |
| Banger |
|
2 | 50 | Varies | Line of Sight, Proximity, Touch | 0 | 0 | Yes | None |
| Rugrat |
|
2 | 150 | 19-225 (Depends on valuable picked up) | Line of Sight, Proximity, Touch | 4 | 0 | Yes | Medium |
| Elsa |
 |
1 | 600 | 30 (5 + 25, Per hit) | Line of sight, Proximity, Touch | [Impossible] | 0 | Yes | Small |
| Heart Hugger |
 |
2 | 300 | 30 (Per hit) | Line of Sight, Proximity, Touch | 9 | 0 | Yes | Medium |
| Headman |
|
3 | 250 | 50 | Line of Sight, Proximity, Touch | 13 | 3 | Yes | Large |
| Mentalist |
|
2 | 150 | 50 | Line of Sight, Proximity, Touch | 4 | 0 | Yes | Medium |
| Shadow Child |
|
1 | 150 | 50 | Eye contact | 9 | 1 | Yes | Small |
| Clown |
 |
3 | 250 | Ranged: 100 (30 + 70)Melee: 60 (10 + 50) | Line of Sight, Proximity, Touch | 13 | 3 | Yes | Large |
| Huntsman |
|
3 | 250 | 100 | Sound, Touch | 9 | 1 | Yes | Large |
| Robe |
|
3 | 250 | Normal: 100Crouched: 50 | Line of Sight, Proximity, Touch | 13 | 6 | Yes | Large |
| Trudge |
|
3 | 500 | Slam: 100Explosion: 100 (20 + 80)
Crouched: 35 (Per hit) |
Line of Sight, Proximity, Touch | 13 | 5 | Yes | Large |
Locations
Locations are various places where the players travel to. These places can be areas to search and repossess valuables, purchase various upgrades and gear, or settle who’s the greatest loser in a battle to the death.
There are currently 6 locations to explore, four of which are vastly different from normal living places, to a fantasy school. However, the other two are special being the Service Station and Disposal Arena.
Swiftbroom Academy
Swiftbroom Academy is one of the 4 normal Locations you can encounter. It features a Magic Academy-like tileset with Potions, Hats, Cauldrons, Beds, Bookshelves, Nightstands, Barrels, Crates, Clothing racks, etc. as Decorations.
Some rooms have Valuables spawn fairly high up on shelves, which in turn require either 2 people, extra jumps, or the Cauldron to reach the Items.
There isn’t much known lore about Swiftbroom Academy, but this should sum up what we currently know.
There are large pits of a yellow substance here and at McJannek Station, which are speculated to have, in some way, caused the creatures we see. However, there is a sign on one of the rooms that says it’s lava, so this has been disproven. The substance has not been disproven in McJannek Station, though.
There is a calendar in some places that says “Class of ’87” and has a photoshopped image of a guy copied over multiple times in different poses. This was the last graduating class in Swiftbroom, and the beginning of the next school year in ’88 was when the incident happened, and the school was abandoned.
If you progress into the late game, you might find a room called “Headmaster’s Study” that has a large chair with a portrait of the headmaster. There is a skeleton in the chair with a hat that matches the portrait. This is assumed to be the dead headmaster.
A name that pops up often with Swiftbroom is Dumgolf. Dumgolf is speculated to have been an extremely powerful wizard at Swiftbroom, although it is unclear whether he was a student, a teacher, or the headmaster. He is believed to be related to the origins of some monsters, such as the Clown. His staff (Dumgolf’s Staff) is a large, valuable item found in Swiftbroom.
There were four headmasters prior to The Incident. This is clarified by 4 portraits that repeatedly occur in Swiftbroom. The third headmaster was Dumgolf, who may have been demoted for improper use of magic (such as creating the clown). Thus, the deceased headmaster is not Dumgolf.
Exclusive Valuables
| Item Name | Image | Value | Size | Details |
| Bird Skull |  |
$500-$650 | Tiny | |
| Bug | 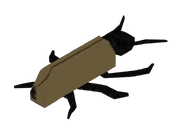 |
$500-$650 | Tiny | |
| Diamond |  |
$2000-$3000 | Tiny | |
| Eyeball |  |
$500-$650 | Tiny | |
| Glowing Jar |  |
$1200-$2000 | Tiny | |
| Small Gem |  |
$500-$650 | Tiny | |
| Small Potion |  |
$1200-$2000 | Tiny | Restores 10 HP to nearby semibots if broken. |
| Chomp Book | 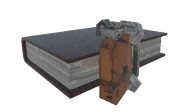 |
$2000-$3000 | Small | Book breaks the lock, flies up, and starts to target and attack you with chomping attacks. Active for roughly 9 seconds. Deals 20 damage to enemies and 5 damage to players per bite. |
| Crown |  |
$500-$600 | Small | |
| Fortune Card | 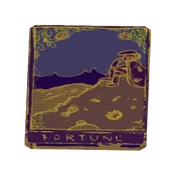 |
$850-$1100 | Small | |
| Gem Box |  |
$900-$1100 | Small | |
| Levitation Potion |  |
$2000-$3000 | Small | |
| Love Potion |  |
$2000-$3000 | Small | When picked up, it will make the player say nice things about the nearest player, or say something nice about the potion if no one is nearby. |
| Pendant |  |
$1200-$2000 | Small | |
| Red Mushroom |  |
$2000-$3000 | Small | |
| Crystal |  |
$2000-$3000 | Medium | |
| Crystal Ball |  |
$5000-$9000 | Medium | When grabbed, it switches the player’s camera to the perspective of the Crystal Ball |
| Eye of Orpigox |  |
$3500-$4500 | Medium | |
| Goblin Head | 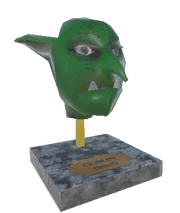 |
$2000-$3000 | Medium | |
| Hourglass |  |
$5500-$7500 | Medium | When a player grabs the hourglass, it will drastically slow them down and lower their voice’s speed and pitch. |
| Poison Chalice | 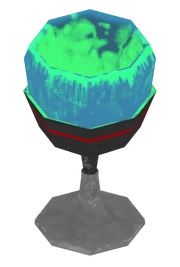 |
$2000-$3000 | Medium | |
| Star Wand |  |
$850-$1100 | Medium | |
| Tentacle |  |
$1200-$2000 | Medium | |
| Wizard Power Crystal | 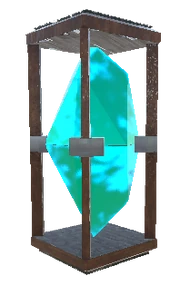 |
$2000-$3000 | Medium | When broken explodes. An explosion always deals 50 damage to both enemies and players. |
| Cauldron Box |  |
$4500-$5000 | Big | |
| Cube of Knowledge |  |
$9500-$12000 | Big | |
| Forever Candle |  |
$5500-$7500 | Big | Deals 5 damage to players and monsters touching its flame. |
| Master Potion |  |
$3500-$4500 | Big | |
| Spider Potion |  |
$4500-$5000 | Big | Partially blinds nearby players with spiders if shattered (Or eyeballs if Arachnophobia Mode is enabled). |
| Unicorn Horn |  |
$3500-$4500 | Big | |
| Alchemy Station |  |
$18000-$25000 | Wide | |
| Dragon Skull | 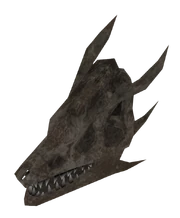 |
$45000-$50000 | Wide | |
| Goblin Arm |  |
$9500-$12000 | Wide | |
| Griffin Statue | 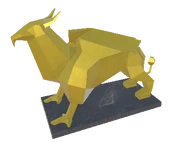 |
$30000-$45000 | Wide | |
| Dumgolf’s Staff |  |
$30000-$45000 | Tall | If damaged, the crystal at the end will emit a laser, similar to the Clown’s, damaging everything it touches. Deals 10 damage to enemies (Up to 37 DPS) and 35 damage to players (Up to 57.5 DPS)per damage tick. |
| Wizard Sword |  |
$9500-$12000 | Tall | Not to be confused with the purchasable item sword, as this one cannot be put in the inventory and is not intended to be used as a weapon. |
| Troll Finger |  |
$45000-$50000 | Very Tall | |
| Wizard Broom |  |
$9500-$12000 | Very Tall | If the box breaks, the broom will start flying up and forward, damaging itself. The box may break even under the action of an indestructible Drone. |
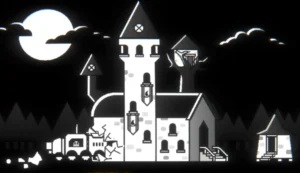
Headman Manor
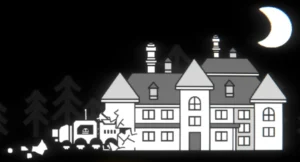
Headman Manor is one of the 4 Locations you can encounter. You can find images of all the rooms at Headman Manor Rooms. It features a mansion/manor tile set with unique decorations for the level, including candles, box televisions, paintings, clocks, and pipes. Some rooms have Valuables spawn in high locations, which require either double jumps, normal jumps, or cleverly placed props to grab.
Exclusive Valuables
| Item Name | Image | Value | Size | Details |
| Emerald Bracelet |  |
$500-$600 | Tiny | |
| Goblet |  |
$500-$600 | Tiny | |
| Ocarina |  |
$500-$600 | Tiny | |
| Pocket Watch |  |
$500-$600 | Tiny | |
| Uranium Mug |  |
$1200-$2000 | Tiny | Creates toxic clouds when broken. |
| Doll | 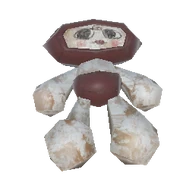 |
$500-$600 | Small | |
| Frog |  |
$1200-$2000 | Small | |
| Globe |  |
$1200-$2000 | Small | |
| Instrument |  |
$1200-$2000 | Small | |
| Money |  |
$500-$600 | Small | |
| Music Box |  |
$3500-$4500 | Small | When picked up, it will make the player spin like a ballerina, making it somewhat difficult to place in the cart without hitting it on anything. |
| Small Vase |  |
$1200-$2000 | Small | |
| Toy Monkey |  |
$900-$1100 | Small | |
| Uranium Plate |  |
$2000-$3000 | Small | Creates toxic clouds when broken. |
| Bottle |  |
$2000-$3000 | Medium | |
| Clown Doll |  |
$2000-$3000 | Medium | |
| Gramophone |
 |
$2000-$3000 | Medium | Plays music that attracts enemies |
| Kettle |  |
$2000-$3000 | Medium | |
| Magnifying Glass |  |
$850-$1100 | Medium | |
| Map |  |
$2000-$3000 | Medium | |
| Old Camera | 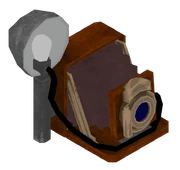 |
$2000-$3000 | Medium | |
| Radio | 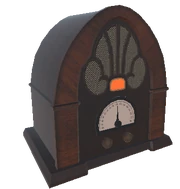 |
$2000-$3000 | Medium | Turns on, making a sound that attracts enemies |
| Ship in a Bottle |  |
$3500-$4500 | Medium | |
| Trophy |  |
$2000-$3000 | Medium | |
| Vase |  |
$2000-$3000 | Medium | |
| Big Vase |  |
$5500-$7500 | Big | |
| Chunky Vase | 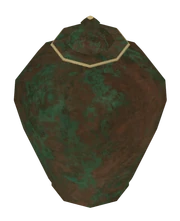 |
$9500-$12000 | Big | |
| Diamond Display |  |
$3500-$4500 | Big | |
| Scream Doll |
 |
$5500-$7500 | Big | When held, it will scream, attack by flailing its arms and try to get closer to the player (This can be minimized by constantly scroll wheeling the doll away from yourself) . |
| Telescope |  |
$3500-$4500 | Big | |
| Television | 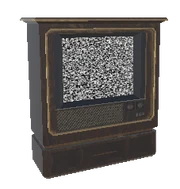 |
$5500-$7500 | Big | Makes a sound that attracts enemies |
| Animal Crate |  |
$18000-$25000 | Wide | |
| Dinosaur | 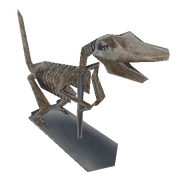 |
$18000-$25000 | Wide | Fragile |
| Piano |  |
$30000-$45000 | Wide | Plays notes when interacting with the keys. Will attract enemies when played |
| Harp |  |
$18000-$25000 | Tall | When interacting with the strings, each emits its own sound. Will attract enemies when played |
| Painting | 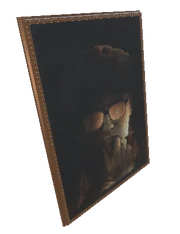 |
$18000-$25000 | Tall | |
| Coffin |  |
$18000-$25000 | Very Tall | |
| Golden Statue |  |
$18000-$25000 | Very Tall | |
| Grandfather Clock |  |
$18000-$25000 | Very Tall | The bell starts to ring loudly |
McJannek Station
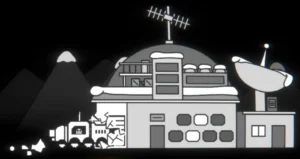
McJannek Station is an Arctic laboratory. In this location, you can find many scientific instruments, such as computers, test tubes, and microscopes. It is snowing outside and some windows are broken. Also, this lab is located high up in the mountains.
Players may occasionally find the Danish flag (Dannebrog) inside the station. Additionally, the emblem of the station can be found on the front desk in the reception room, in which the text on it says “MCJANNEK STATION” at the top, and “ARCTIC RESEARCH” at the bottom, meaning that McJannek Station is located in the Arctic. (most likely Greenland, as the old emblem had “GREENLAND” as the bottom text instead of “ARCTIC RESEARCH”)
Exclusively in this map, players may encounter a TV that is turned on, showing a question that says “Are you still watching ‘Moose Fighting Volume II: Antler Mania'” which shows the prompts “Continue Watching” or “Back,” wherein if the player chooses the former (which can only be interacted), it will result in a moose jumpscare and will fling the player backwards.
On this map, there is a calendar that shows the last day McJannek Station was in use was April 15th, 2097.
Exclusive Valuables
| Item Name | Image | Value | Size | Details |
| Coffee Cup |  |
$2000-$3000 | Tiny | |
| Eraser | 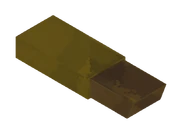 |
$500-$650 | Tiny | |
| Keycard |  |
$250-$500 | Tiny | |
| Phone |  |
$1200-$2000 | Tiny | Periodically vibrates loudly; creates a large sound for monsters to potentially hear. |
| Pills |  |
$500-$650 | Tiny | |
| Smartwatch | 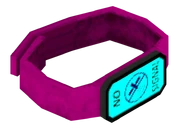 |
$500-$650 | Tiny | |
| Stapler | 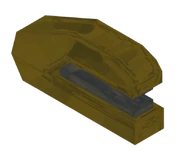 |
$500-$650 | Tiny | |
| Uranium Petri Dish |  |
$1200-$2000 | Tiny | Creates toxic clouds when broken. |
| USB Stick | 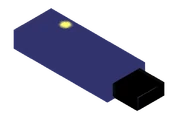 |
$500-$650 | Tiny | |
| Bonsai Tree |  |
$900-$1100 | Small | |
| Calculator |  |
$850-$1100 | Small | |
| Camera |  |
$2000-$3000 | Small | Can stun nearby players and monsters when damaged. |
| HDD |  |
$2000-$3000 | Small | |
| VHS |  |
$1200-$2000 | Small | |
| 3D Printer | 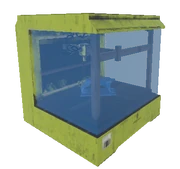 |
$5500-$7500 | Medium | |
| Computer |  |
$2000-$3000 | Medium | |
| Fan |  |
$2000-$3000 | Medium | Is a trap. When held, it produces an air stream that blows away anything in front of it. |
| Fire Extinguisher | 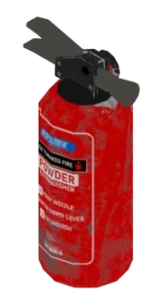 |
$3500-$4500 | Medium | |
| Flashlight | 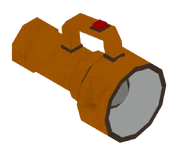 |
$1200-$2000 | Medium | If you grab it, it produces a bright light. |
| Laptop | 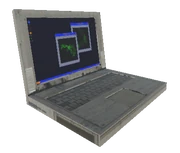 |
$2000-$3000 | Medium | |
| Propane Tank | 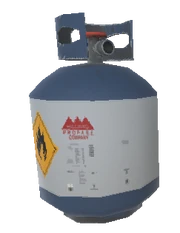 |
$3500-$4500 | Medium | Is a trap. If damaged, will emit a flame for approximately 14 seconds (may be random). Deals 2 damage to monsters (Up to 30 DPS) and 1 damage to players (Up to 19 DPS) per damage tick. When broken, it creates an explosion that deals 100 damage to monsters and 50 damage to players. |
| Sample Six Pack | 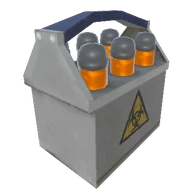 |
$2000-$3000 | Medium | |
| Sample |  |
$2000-$3000 | Medium | |
| Scale | 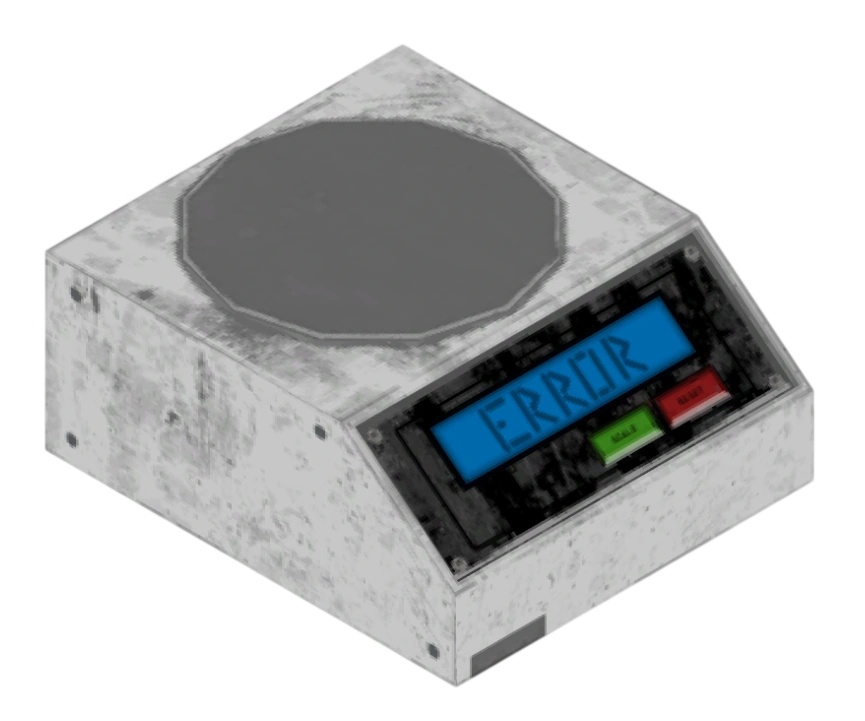 |
$3500-$4500 | Medium | |
| Barrel | 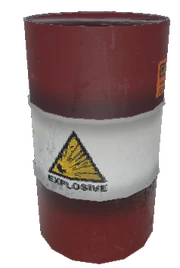 |
$9500-$12000 | Big | If the barrel gets hit three times, it will cause several extremely quick explosions, each dealing 100 damage to both monsters and players (damage is always the same, although it should be calculated by the size and velocity of the explosion). It can explode even under the effect of an Indestructible Drone, but the barrel won’t be destroyed. This can make it a great weapon, but be aware that, due to a bug, when you disable the drone after the barrel has exploded, it will explode again, destroying the barrel. |
| Big Sample |  |
$2000-$3000 | Big | |
| Creature Leg |  |
$9500-$12000 | Big | |
| Flamethrower |  |
$3500-$4500 | Big | Is a trap. Upon impact, it releases a jet of flame. When held by the red handle, the flame will go on continuously until it runs out. Deals 15 damage to monsters (Up to 48 DPS) and 10 damage to players (Up to 40 DPS) per damage tick. Has 10 seconds’ worth of fuel |
| Guitar |  |
$3500-$4500 | Big | If you touch the strings, they will make a sound. |
| Icepick |  |
$2000-$3000 | Big | |
| Ice Saw |  |
$3500-$4500 | Big | Is a trap. When interacting, it turns on, damaging everything that touches the saw blade. Can be turned on for a set period without the option to turn it off. Deals 5 damage to enemies (Up to 17 DPS) and 1 damage to players (Up to 8.2 DPS) |
| Sample Cooler |  |
$3500-$4500 | Big | |
| Centrifuge |  |
$9500-$12000 | Wide | |
| Ice Block |  |
$9500-$12000 | Wide | |
| Snow Bike |  |
$9500-$12000 | Wide | It is drivable if you grab the handlebars; there is no brake, though. |
| Wide Sample Cooler | 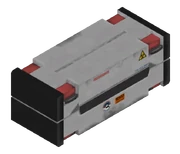 |
$5500-$7500 | Wide | |
| Heavy Water | 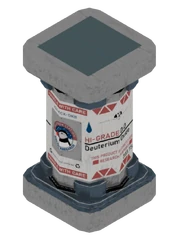 |
$30000-$45000 | Tall | |
| Jackhammer | 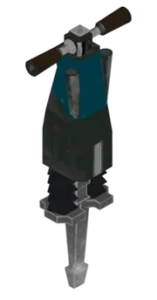 |
$9500-$12000 | Tall | Will start drilling when picked up, producing noise and making the valuable vibrate. |
| Science Station | 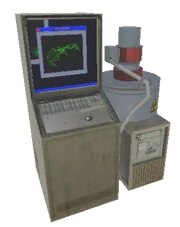 |
$18000-$25000 | Tall | |
| Cryo Pod | 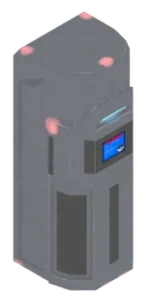 |
$18000-$25000 | Very Tall | |
| Server Rack | 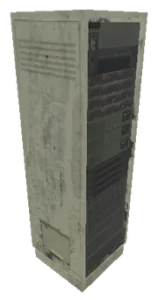 |
$18000-$25000 | Very Tall |
Museum of Human Art
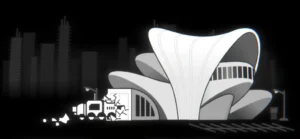
Museum of Human Art, originally called “the Avant-Garde,” is a Location currently in the main game, and is one of the 4 locations you can encounter in R.E.P.O. It features a museum-like tileset with broken statues, giant food items, and other various artifacts as decoration. Some Valuables are located high up, requiring jumps, parkour, and/or well-placed props to obtain. The museum is a large, multi-floored stone building with multiple exhibits and artworks scattered throughout.
The Museum of Human Art has a lot of graffiti (most likely by The Human Group) that depicts the Semibots and Taxman as evil. The graffiti also hints at the origins of some monsters, such as the Clown and Apex Predator.
In the launch trailer for the Museum Update, the narrator explains that the museum was created due to a need for “something new” where “robots and automation” were not allowed. This contributes to the already existing underlying theory that whoever ran the museum viewed the Semibots and Taxman as evil.
In the monster update, new rooms were added. While some depict backrooms or exhibits not uncommon in a museum, others include campsites with semibot heads on spikes and even a cage containing a semibot with graffiti above stating it wanted to be captured and that the group staying there has left. This means that not only did humans, or some other species with human-like intelligence, use the museum as shelter, but they also encountered semibots prior to the museum’s abandonment and the apparent decline of humanity.
Exclusive Valuables
| Item Name | Image | Value | Size | Details |
| Banana Bow | 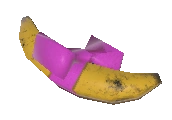 |
$900-$1100 | Tiny | |
| Cool Brain |  |
$500-$600 | Tiny | |
| Fish |  |
$500-$600 | Tiny | |
| Golden Tooth |  |
$900-$1100 | Tiny | |
| Gold Fish |  |
$1200-$2000 | Tiny | |
| Ruben Doll |  |
$500-$600 | Tiny | |
| Silverfish |  |
$900-$1100 | Tiny | |
| Toast |  |
$500-$600 | Tiny | |
| Tooth |  |
$500-$600 | Tiny | |
| Cocktail |  |
$3500-$4500 | Small | If tilted, the liquid will spill out and lose its value. If you have the Indestructible Drone on it and tilt it while it’s full, it won’t lose any value. |
| Cube Ball |  |
$1200-$2000 | Small | |
| Cubic Tower |  |
$900-$1100 | Small | |
| Duck Man |  |
$900-$1100 | Small | |
| Flesh Blob |  |
$1200-$2000 | Small | |
| Lady Bug |  |
$1200-$2000 | Small | |
| Pimple Guy |  |
$1200-$2000 | Small | |
| Toy Car |  |
$900-$1100 | Small | Drives around after being grabbed. |
| Toy Plane | $900-$1100 | Small | Flies around after being grabbed. | |
| Wire Figure |  |
$2000-$3000 | Small | |
| Cubic Sculpture |  |
$4500-$5000 | Medium | |
| Gumball Machine | 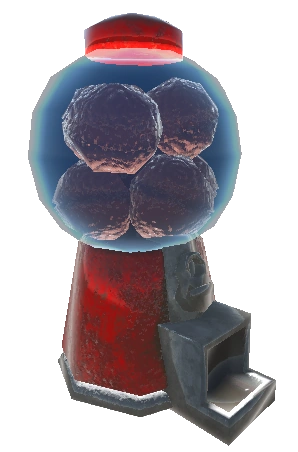 |
$5500-$7500 | Medium | Will pull everyone’s FOV to itself if held. |
| Handface |  |
$2000-$3000 | Medium | |
| Monkey Box | 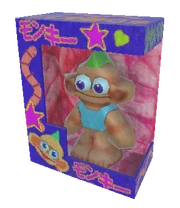 |
$2000-$3000 | Medium | |
| Pacifier |  |
$3500-$4500 | Medium | |
| Teeth Bot |  |
$2000-$3000 | Medium | If voice chat is on, it will repeat the holder’s voice at a higher pitch. |
| Baby Head |  |
$4500-$5000 | Big | Makes noises while standing upright. |
| Egg |  |
$3500-$4500 | Big | If cracked enough, it will turn into a time bomb. |
| Gem Burger | 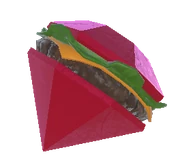 |
$5500-$7500 | Big | |
| Golden Swirl |  |
$9500-$12000 | Big | |
| Museum Boombox | 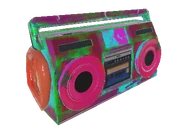 |
$5500-$7500 | Big | Will play music and make players’ FOV start bobbing when held. |
| Uranium Mug Deluxe |  |
$5500-$7500 | Big | Creates toxic clouds when broken. |
| Horse | 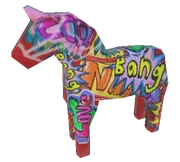 |
$30000-$45000 | Wide | |
| Tray |  |
$18000-$25000 | Wide | Will lose value if tilted. |
| Vinyl |  |
$18000-$25000 | Wide | |
| Worm |  |
$9500-$12000 | Wide | |
| Milk | 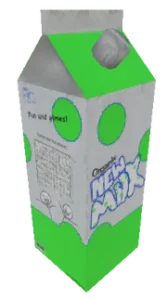 |
$9500-$12000 | Tall | |
| Tall Guy |  |
$18000-$25000 | Tall | |
| Blender | 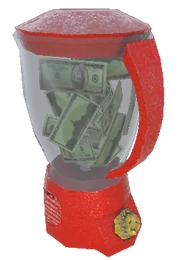 |
$18000-$25000 | Very Tall | Will start blending the money inside when held, after which it can be used as a weapon. |
| Traffic Light |  |
$30000-$45000 | Very Tall | Will explode if held when red. |
Disposal Arena

Disposal Arena is the last location players will reach. It functions as a game-over location for players.
You spawn at what appears to be an extraction point, with the phone inside the truck. The Taxman humiliates you with emojis before dropping you into the Disposal Arena in the Tumble state and playing a dramatic soundtrack.
Assuming you’re playing with other players, it drops you into the Arena, which is a platform surrounded by the void. When inside the Disposal Arena, your objective is to knock other players off the platform or kill others until you are the last one left alive. The arena is riddled with shop items and many valuables that can be used to achieve the objective. The arena is made of rings, with each outer ring collapsing over time.
There is a crown in the middle of the arena that is on a pedestal with the last reached level, as long as more than one player is still alive in the arena. After that, this number will be reset to “1,” and the crown will be up for grabs. The player who grabs the crown will be granted the title of “King of the losers,” and the crown will be visible on top of your character in the menu and in-game until the next Arena sequence.
As of the 2026 Cosmetic update, a new challenge arena can conclude a match. This time, the competition is a go-karting race using the new Scout karts to race against your friends and chase the crown as it flies away. In order to win, you need to be in front of all other players and make sure not to fall off or be too slow, as the platforms are constantly dropping.
There is a timer ticking down at the top of the screen that shows how close the platform you are currently on is to dropping, and getting to another platform increases that timer. Once all other players are dead, the crown will fly towards you, killing you and awarding you with the crown.
If you aren’t inside a Multiplayer game, you are dropped into the void with the text reading: “GAME OVER.”
If no player claims the crown (everyone dies), the conclusion screen will pop up with the text “EVERYONE’S A LOSER!” and a crown over feces.
Additionally, if a weapon appears that you have used within the prior game, it will retain the charge state (so a broken bat will remain broken if it was emptied in the round)
King of the Losers Carting Tips
Holding down “A” or “D” and releasing gives you a speed boost while using the kart. Using the same keys, you can also maneuver your way to bonk into other players to throw them off course; however, this is risky, as this could slow you down or bring you down with them. Instead of holding down “W” in anticipation before the race, press and hold the key as soon as the countdown finishes, showing “1.”
Service Station

In a Service Station, there is a variety of random items, including weapons, health packs, and upgrades, which can be bought for money earned during missions. There are no monsters on this location. The players are free to test any items available on the Station, as they have infinite ammo here.
Any damage taken in this area is undone after leaving the Service Station. Dead players can be revived using the extraction point for buying items. If all players die at the Service Station, they will be moved to the next level as if they had left the station normally.
At every Service Station, there will be a shopkeeper who can be activated by pressing an orange button with an eye icon. The shopkeeper will then look around the station, and if anyone misbehaves (such as by exploding items), the shopkeeper will pull them in with a tractor beam. At first, it will only grab the player and shake them around; on the third time, it will explode the player with a cannon.
A common speedrun tactic here is to buy only the items you need, then self-destruct. This allows you to skip going to the truck entirely. This is usually only used in single-player.
There is a secret area that is accessible in every shop. This room may contain a duct-taped grenade, a human grenade, and a Duck Bucket. There are multiple ways to get into the secret room; the main ways are to look around for any abnormalities in the shop and to use explosives to break any walls with cracks.
You can reset the shop by simply leaving and rejoining the game, once you get the items that you need, buy them and then make sure you join the next level. This allows the game to save your upgrades. As of the Museum Update, this can only be done in Private and single-player lobbies.